New Scanning and Text Capabilities with VisionKit
VisionKit comes with new Scanning and Text Capabilities. In this tutorial, you’ll learn how to use Apple’s latest VisionKit update to take advantage of the new capabilities. By Warren Burton.
Restricting Recognized Types
Barcode Symbologies
A barcode symbology is a standard coding method for a piece of data. If you encode your data using QR symbology, anybody with a QR reader can decode it.
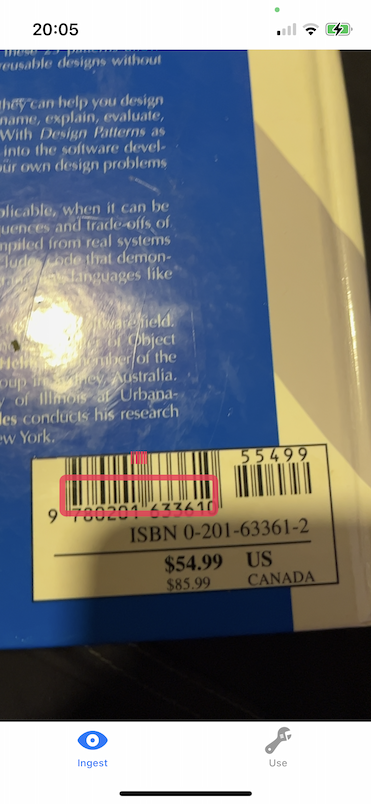
For instance, say your museum or library visitor would like to scan some text or the ISBN of a book. An ISBN is a 13-digit number. An ISBN should use EAN-13 symbology in barcode format, so you’ll restrict your scanning to that type.
VNBarcodeSymbology declares all the types that you can read with VisionKit. Among those types is the EAN-13 standard.
Configuring the Scanner
In ScannerViewController, locate makeDatascanner and find the comment // add types here.
Delete the comment, then add this code to the array in the parameter recognizedDataTypes:
.barcode(
  symbologies: [
    .ean13
  ]),
.text(languages: ["en", "pt"])
You told the DataScannerViewController to look for one type of barcode and English or Portuguese text. Feel free to customize the languages array with the ISO 639-1 language code for your own country.
Build and run, then scan the barcodes above again. Notice how Slurpy locks onto the barcodes quicker and spends less time jumping around locking onto other items in the field of view.
Customizing the Scanner View
The UI that DataScannerViewController provides is effective, but say you want something else. Pink is hot right now, so you’ll learn to make a custom guide rectangle next.
DataScannerViewController has a property overlayContainerView. Views placed inside this container won’t interfere with the hit testing in the scanner, which means you can still touch items to add them to your catalog. You’ll make a SwiftUI-based renderer for the recognized items you scan.
Adding a Model
You’re at the point in your app where you need a model layer to keep track of the objects that DataScannerViewController recognizes. The starter project includes a simple model layer to save time and keep the focus on the tutorial topic.
DataScannerViewController uses VisionKit.RecognizedItem to describe an object that it sees.
In the Project navigator, open Model. Then open TransientItem.swift. TransientItem is a wrapper around RecognizedItem. You have this structure so your app isn’t dependent on the data structure of RecognizedItem.
The next data structure is StoredItem.swift. StoredItem is Codable and can be persisted between sessions.
The last file in the Model group is DataStore.swift. DataStore is an ObservableObject and a container for both StoredItem that you want to keep and TransientItem that DataScannerViewController recognizes during a scanning session.
DataStore manages access to the two @Published collections, collectedItems and transientItems. You’ll plug it into your SwiftUI code later.
In the next section, you’ll use this model to build an overlay view.
Creating an Overlay View
You’re now ready to create that cool 1980s-inspired interface you’ve always wanted. In the Project navigator, select the Views group.
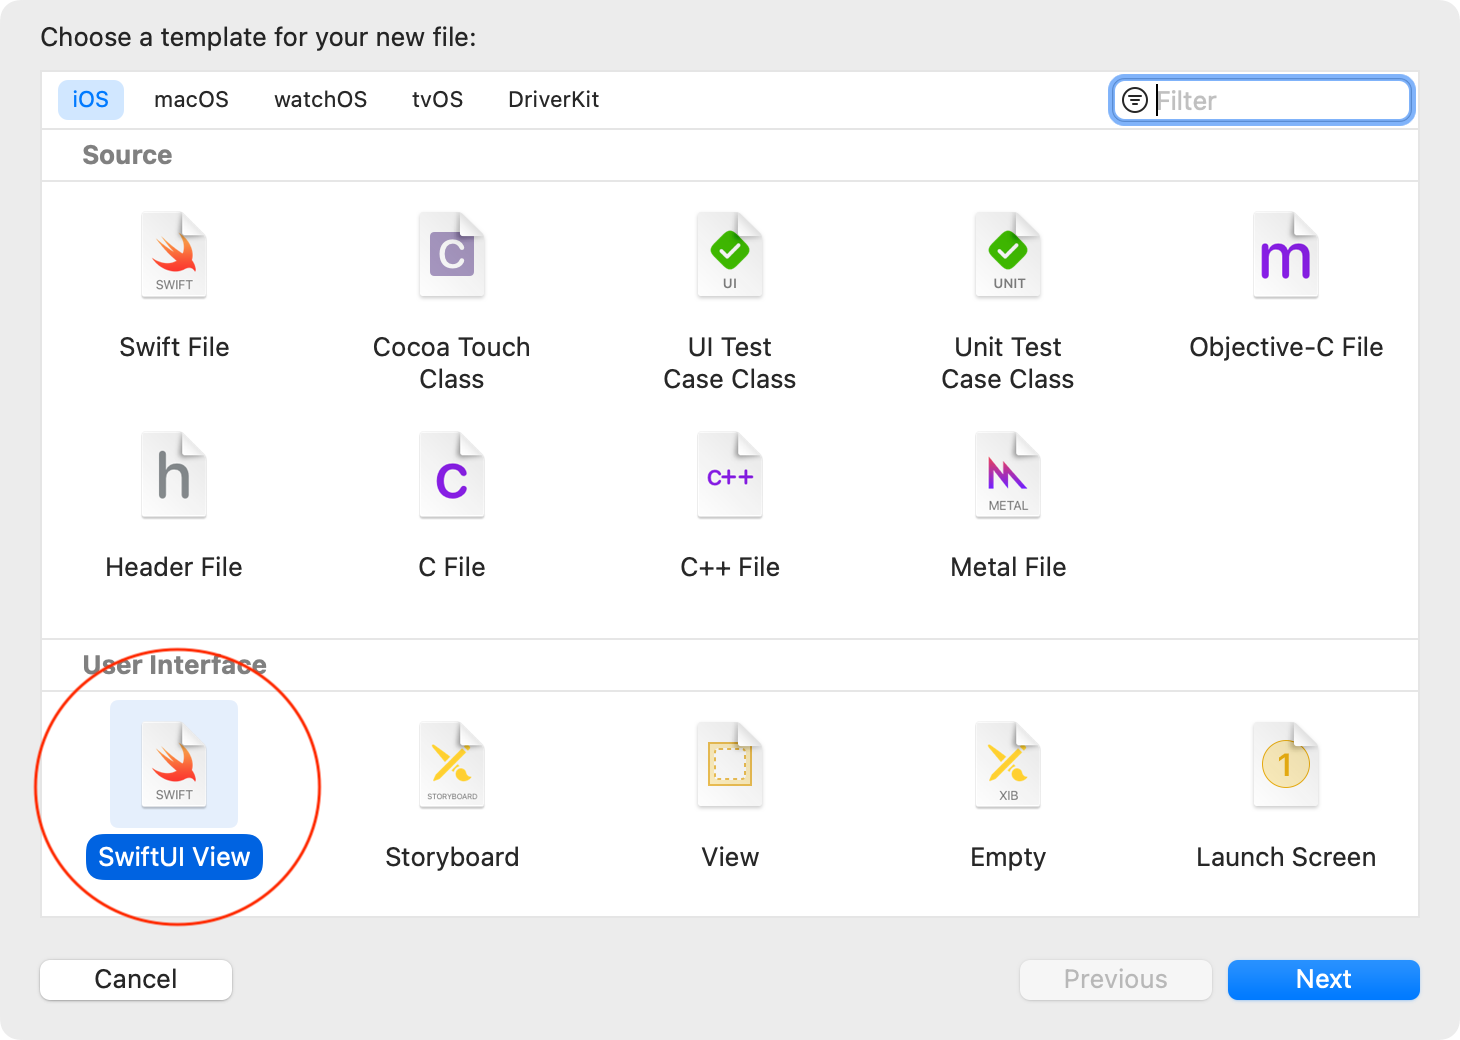
- Press Command-N to present the File Template picker.
- Select SwiftUI View and press Next.
- Name the file Highlighter.swift and press Create.
In Highlighter.swift, replace everything inside of Highlighter with:
@EnvironmentObject var datastore: DataStore

var body: some View {
  ForEach(datastore.allTransientItems) { item in
    RoundedRectangle(cornerRadius: 4)
      .stroke(.pink, lineWidth: 6)
      .frame(width: item.bounds.width, height: item.bounds.height)
      .position(x: item.bounds.minX, y: item.bounds.minY)
      .overlay(
        Image(systemName: item.icon)
          .position(
            x: item.bounds.minX,
            y: item.bounds.minY - item.bounds.height / 2 - 20
          )
          .foregroundColor(.pink)
      )
  }
}
In this View, you draw a RoundedRectangle with a pink stroke for each recognized item seen. Above the rectangle, you show an icon that shows whether the item is a barcode or text. You’ll see this in action soon.
Hosting a SwiftUI View
In the Project navigator, open the ViewControllers group and then open PaintingViewController.swift. Add this import above PaintingViewController:
import SwiftUI
Add this code inside PaintingViewController:
override func viewDidLoad() {
  super.viewDidLoad()

  let paintController = UIHostingController(
    rootView: Highlighter().environmentObject(DataStore.shared)
  )
  paintController.view.backgroundColor = .clear
  view.pinToInside(paintController.view)
  addChild(paintController)
  paintController.didMove(toParent: self)
}
Here you wrap Highlighter in a UIHostingController and inject the shared instance of DataStore into the view hierarchy. You’ll use this pattern a few more times in this tutorial.
The general sequence for hosting a SwiftUI View in a UIViewController is:
- Create a
UIHostingControllerfor your SwiftUI view. - Add the
viewof theUIHostingControllerto the parentUIViewController. - Add the
UIHostingControlleras a child of the parentUIViewController. - Call
didMove(toParent:)to notifyUIHostingControllerof that event.
Open ScannerViewController.swift again. Inside the body of ScannerViewController, add the following property below var datascanner: DataScannerViewController?.
let overlay = PaintingViewController()
Next in makeDataScanner, locate the parameter isHighlightingEnabled and set it to false so the default UI doesn’t appear under your much better version.
Finally, add this line at the end of installDataScanner:
scanner.overlayContainerView.pinToInside(overlay.view)
The Highlighter view is now part of the view hierarchy. You’re almost ready to go.
Using Delegate Methods
Return to ScannerViewController.swift and locate extension ScannerViewController: DataScannerViewControllerDelegate, which you added earlier. There are four methods in that extension.
The top method is:
func dataScanner(
  _ dataScanner: DataScannerViewController,
  didAdd addedItems: [RecognizedItem],
  allItems: [RecognizedItem]
)
This delegate method is called when DataScannerViewController starts recognizing an item. Add this code to the body of dataScanner(_:didAdd:allItems:):
DataStore.shared.addThings(
  addedItems.map { TransientItem(item: $0) },
  allItems: allItems.map { TransientItem(item: $0) }
)
Here you map each RecognizedItem to a TransientItem, then forward the mapped collections to DataStore.
Next, you’ll complete a similar task for dataScanner(_:didUpdate:allItems:), which is called when an item is changed.
Add this code to the body of dataScanner(_:didUpdate:allItems:):
DataStore.shared.updateThings(
  updatedItems.map { TransientItem(item: $0) },
  allItems: allItems.map { TransientItem(item: $0) }
)
Follow up with the third delegate dataScanner(_:didRemove:allItems:), which is called when DataScannerViewController stops recognizing an item.
Add this code to the body of dataScanner(_:didRemove:allItems:):
DataStore.shared.removeThings(
  removedItems.map { TransientItem(item: $0) },
  allItems: allItems.map { TransientItem(item: $0) }
)
The final delegate, dataScanner(_:didTapOn:), is called when you touch the screen inside a recognized region:
Add this line to the body of dataScanner(_:didTapOn:):
DataStore.shared.keepItem(TransientItem(item: item).toStoredItem())
keepItem uses a StoredItem because you’re trying to persist the object, so you convert TransientItem to StoredItem using a helper.
In that section, you routed the changes from DataScannerViewController to DataStore, performing all the necessary mapping at the client side.
Build and run to see the new hotness.

You now have a scanner capable of recording text and ISBNs. Next, you’ll build a list to display all the items you collect.