Introduction to Unity UI – Part 1
UI is a crucial part of any video game. Even in the most basic of games you need to navigate a main menu to start the action! In this tutorial, you’ll learn about the most common components developers use to build user interfaces in Unity. All while listening to some sweet sliding blues music. :] By Ben MacKinnon.
UI Anchors
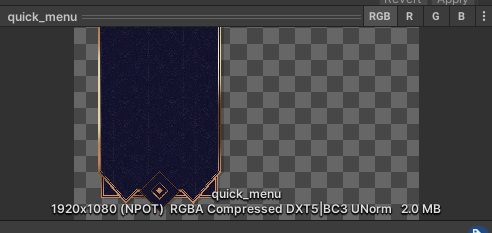
You may remember the Panel covered the full size of the canvas, yet the image is only visible on part of the screen. If you take a look at the image used (Assets / UI / quick_menu), you can see that’s just how this image is set up. It’s a 1920×1080 image with the banner graphic, and everywhere else is transparent.
To be able to lay out the UI on top of this, you’ll need to set up an empty GameObject over the top of the banner so the rest of the UI stays within the banner graphic. Stop the game, then right-click the Panel and select Create Empty. Name this new child GameObject Menu. To make it easy, set the Alpha on the Canvas Group of the Panel back to 1 for the time being.
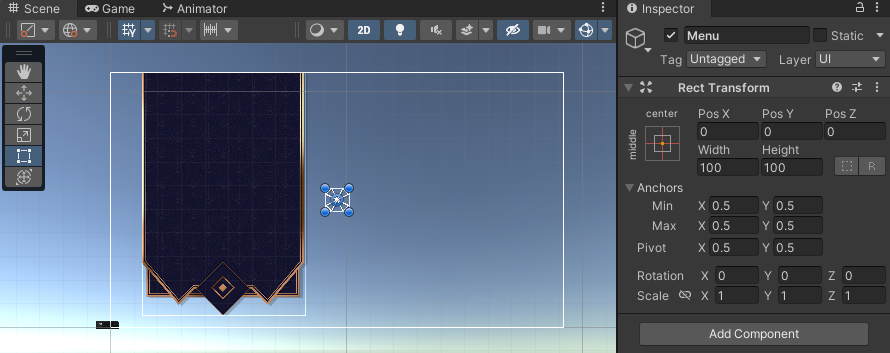
When you add a new GameObject, it’s automatically centered to its parent with a width and height of 100. Select the Rect tool option from the Tool menu in the Scene Window in order to see the corners of the RectTransform of the Menu GameObject.
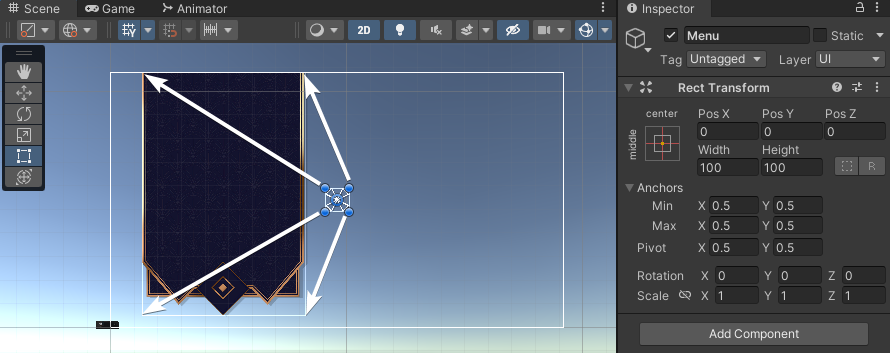
You first need to resize this object so that it covers the actual banner part of the UI. You can do this by dragging each corner into position.
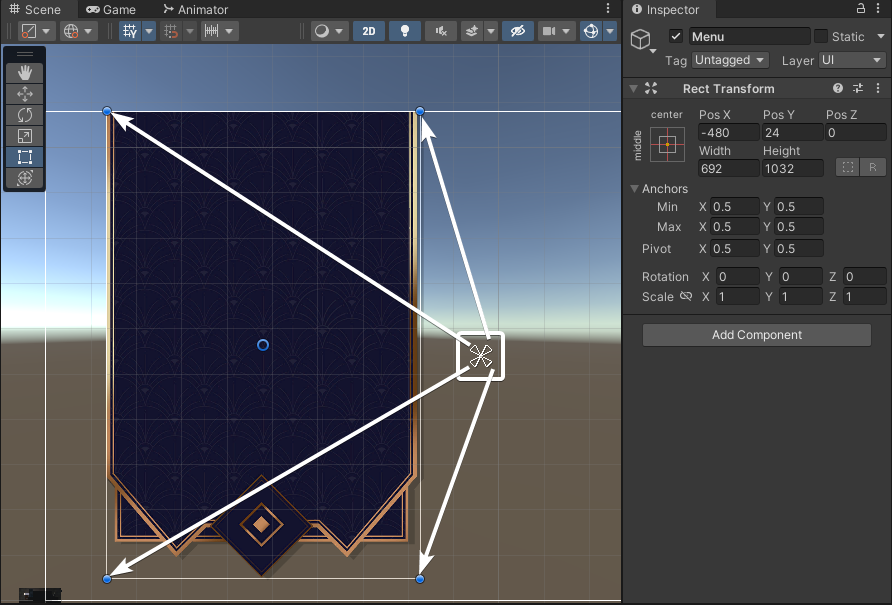
If you drag the corners into position, you’ll likely have RectTransform values of about (X:-480, Y:24, width:692, height:1032). This will let the object fit over the banner perfectly fine for the current screen ratio, but because the RectTransform is still anchored to the center of the screen, if the resolution changes the object may move out of alignment.
To fix this, you need to adjust the Anchors values so the RectTransform values all end up back at 0.
Look back in the Scene view once more. You’ll see a little group of triangles still sitting in the middle of the canvas space. These show the anchor positions. You can drag them into position just like you dragged the corners of the RectTransform.
The UI you’re going to build is height-dependent (that’s why you set the Canvas Scaler Match value to Height), so you also need to make this object be height-dependent. The top anchors will already be at the top of the canvas space, but make the bottom anchors be at the bottom of the canvas instead of the bottom of the graphic. This way, the graphic can expand itself to fill more room on a taller screen. And you always know what the distance will be from the bottom of the screen to the bottom of the UI.
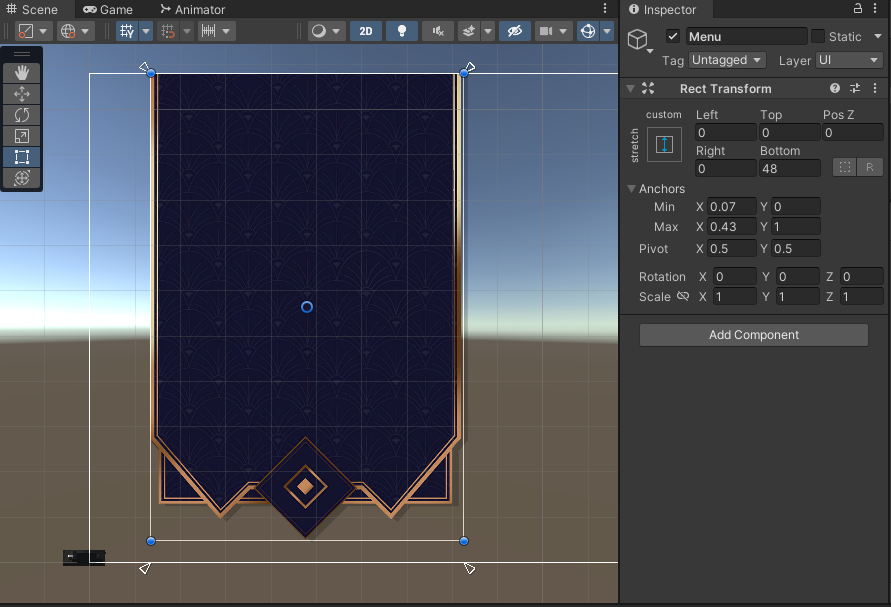
With it all set up, the RectTransform of the Menu GameObject should have the following values:
- Left, Top, Pos Z, Right all set to 0.
- Bottom set to 48.
- Anchors: Min (X:0.07, Y:0) Max (X:0.43, Y:1).
This layout is a little unusual, and it may be more complex than some. But it’s important to learn the power of Anchors and how they can help you lay out your UI across multiple devices without worrying how it will look later.
Now that the Menu object is set up, it’s time to fill it with some actual UI!
Adding Core UI Elements
Unity has many UI elements that come as part of the system. These allow you to rapidly build a UI without having to worry about the trivial stuff like click detection and hover states. There’s just time to look at one of them here, but in Part 2 of this tutorial, you’ll learn about a lot more of them.
UI Button
The most common element — the UI Button — is something you previously brought into the world canvas. You added some functionality to be called from its OnClick method. But there are some other details to look at, too.
The UI Button, like most of the UI components, inherits from the Selectable class. This class adds the color transition that you can see on the button. The prefab you used before already had colors set up, and the Text component of the button as the target of that transition. When you press play in Unity and hover the mouse over that button, you see that the text changes color. That’s the Selectable at work.
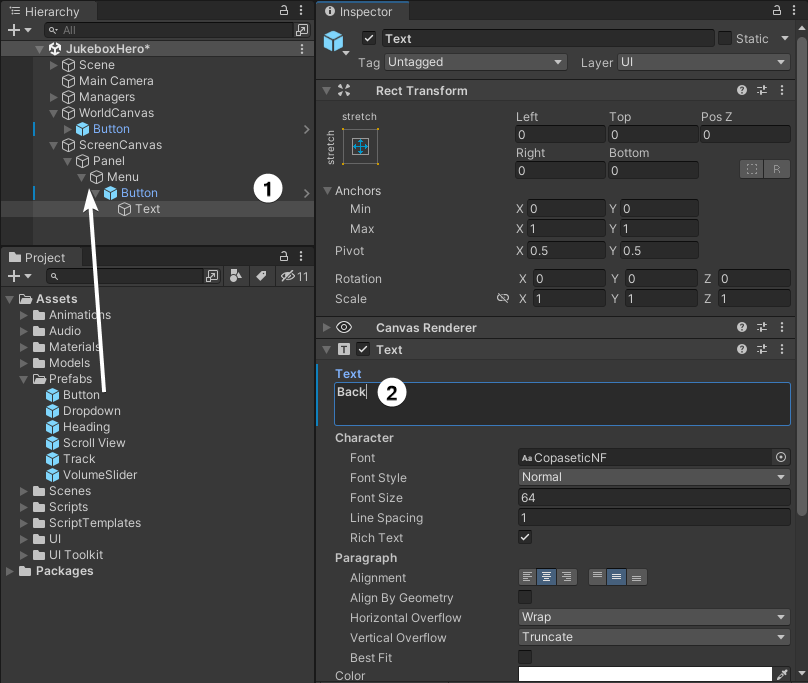
Time to add another button to the scene — but this time add it to the Screen Space UI. You can use the same prefab as before. Drag the Button prefab from Assets / Prefabs into the Hierarchy as a child of the Menu object. Don’t worry about its position for now, but do the following steps:
- Rename the GameObject to Button Back.
- Change the text of the button to Back.
This button performs the opposite action as the World Space button, so set up the following events to be called from OnClick:
-
World Canvas:
GameObject.SetActivewith the checkbox checked. -
Main Camera:
CameraTween.MoveToIdle. -
Panel:
Animator.SetTriggerwith the value Home.

Quickly set the Alpha on the Canvas Group of the Panel back to 0 and test your work. Save the scene. Press Play, then click the World Space button. Your 2D menu will appear, and clicking on the new Back button will take you back to the original view.
Where to Go From Here
Download the completed project files by clicking the Download Materials button at the top or bottom of the tutorial.
In this first part of the Unity UI tutorial, you learned all about the different canvas systems and how to scale your UI for different screens. You built a basic World UI and the beginning of a Screen Space UI using the Button component, the most common of the UI components.
In the next part of this tutorial, you’ll learn about some of the different UI components that come included in Unity’s UI system. And, you’ll use these to finish building the Screen Space UI to let players change what’s playing on the jukebox.
We hope you enjoyed this tutorial. If you have any questions or comments, please join the forum discussion below!