Splash Screen Tutorial for Android
Learn how to implement splash screen in new and existing Android apps, using the SplashScreen API introduced in Android 12. By Jemma Slater.
Open any app from the launcher on your Android device and you’re likely to see a splash screen — a simple full-screen layout, usually displaying the app logo on a plain background. The display ends soon after the app has loaded.
Android 12 introduced splash screens as default behavior along with the SplashScreen API for developers to customize as needed. Splash screens aren’t a new concept — many apps had their own splash implementation. This tutorial will help you handle the splash screen in legacy and new projects.
In this tutorial, you’ll learn:
- The purpose of the splash screen.
- How to migrate legacy splash screen implementations.
- How to customize the default splash screen in Android 12.
Getting Started
Start by downloading the starter project, using the Download Materials button at the top or bottom of this tutorial.
Open the project in Android Studio Bumblebee or later and get familiar with the files. The app – ColorSplash contains one screen showcasing Material Design-recommended color palettes. This tutorial covers adding your first splash screen and migrating a legacy implementation.
If you’re not interested in migrating an old implementation of a splash screen, ignore the TODO comments labeled: // TODO: (Legacy Migration) and the file LegacySplashActivity.kt.
Choosing the Target SDK Version
Android 12 introduced the SplashScreen API. The targetSdkVersion must be set to at least 31 in build.gradle. However, even if you start a project from scratch, it is always recommended to provide back support for a few previous versions when picking your app’s minimum SDK version. You should base this on the number of users running each Android version in your target demographic. You want to enable as many users as possible. Luckily, the AndroidX SplashScreen compat library supports backward compatibility. For this sample project, the minSdkVersion is set to 29 (Android 10).
Setting Up the Emulators
Regardless of whether you choose to use and implement the SplashScreen API, the default behavior changed with Android 12. To comprehend the changes, run the sample project across two versions of Android to see each version’s behavior. Don’t worry, you don’t need to buy a second phone! Instead, set up two emulators, each running a different API version.
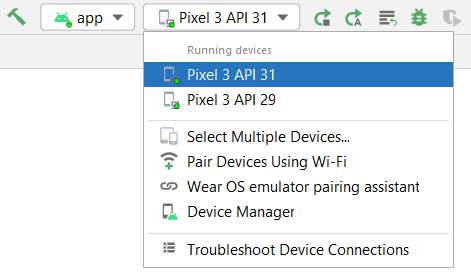
Set up two emulators from which to test the splash screen behavior. For example, set up two Pixel 3 emulators running API 29 (Android 10) and API 31 (Android 12). It doesn’t matter which devices you choose as long as you have Android versions 10 and 12 covered.
Testing the Default Behavior
It’s time to see the splash in action! Use the drop-down at the top of the screen to select the emulator you launch the app on.
Pre-Android 12 Splash Behavior
First, build and run on API 29, force close, and reopen from the launcher.
Android 10 doesn’t have a default splash implementation. A blank screen shows when the app starts. Improving users’ experience and reducing the feeling of delay is one of the reasons developers added their splash screen implementation.
Default Android 12 Splash Behavior
In Android Studio, change your target emulator to API 31. Build and run the app, force close and reopen from the launcher. As the app starts, you’ll see the default splash screen: the app logo centered on a screen colored to match windowBackground from your app theme.
If you don’t have any legacy code and you don’t need further customization, you don’t need to do anything else. Users will see the default splash from Android 12 onward automatically. However, even without additional customization, implementing the SplashScreen compat library can help improve the experience for users on older versions. Read on to find out why splash screens are important.

Splash Screens
App Startup States
To understand why splash screens are essential, you need to understand the various app startup states. Users launch Apps in many ways: first-time open from a fresh install, quickly switching between Recents or from the main launcher for the first time in days. Your app needs to handle all these scenarios.
Your app will launch from one of the following states:
- Cold start: Any time your app is freshly launched, including the first launch after installation or device restart, it’s considered a cold start. The system also kills apps in the background to free memory. If your app hasn’t been used for a while or the device is low on memory, then even if your app has previously been open, the system might still treat it as a cold start. Launching from that state takes the longest because the system has to create the app process and load in the app. This is a perfect use case for showing a splash screen that gives the impression of a shorter delay while giving you the opportunity to get creative with your branding.
- Warm start: Your app can be in various states of retainment as the system starts to release memory. That creates a warm start: The system does not need to initialize everything but has lost some information and needs to reload it. For example, the app process might still be running, but the activity requires re-creation to display. That doesn’t take as long as a cold start, but it’s often long enough to warrant a splash screen.
- Hot start: If the system has the app process and layout information in memory, it doesn’t need to re-initialize anything and can bring the app back to the foreground. This is a hot start and it’s quick, leaving no time for a splash screen.