Swift Accelerate and vImage: Getting Started
Learn how to process images using Accelerate and vImage in a SwiftUI application. By Bill Morefield.
Finalizing the Histogram Data
Finally, you can go back to normal Swift-land because either the calculated values reside in the arrays you created earlier or something went wrong. Add the following code to finish out the method:
// 1
guard error == kvImageNoError else {
  printVImageError(error: error)
  return nil
}

// 2
let histogramData = HistogramLevels(
  red: redArray,
  green: greenArray,
  blue: blueArray,
  alpha: alphaArray
)

// 3
return histogramData
It’s nice to be back in standard Swift, isn’t it? Here’s what you do here:
- Check for any error and if there is one, print it out.
- Create a
HistogramLevelsstruct from the raw histogram data. - Return the histogram data.
This HistogramLevels struct is defined inside HistogramView.swift in the project. It provides an array to each channel of the image. Feel free to open the file to take a look at how the struct is defined.
Visualizing the Histogram Data
Now, to visualize the histogram data, open ContentView.swift. Add the following to the list of properties at the top of the struct:
@State private var originalHistogram: HistogramLevels?
@State private var processedHistogram: HistogramLevels?
Then, you need to pass the optional histogram to the view. Change the first ImageView call to:
ImageView(
  title: "Original",
  image: originalImage,
  histogram: originalHistogram)
and the second to:
ImageView(
  title: "Processed",
  image: image,
  histogram: processedHistogram)
.padding(3)
Next, inside the sheet(isPresented:onDismiss:content:) call, replace the contents of the onDismiss closure with the following:
let imageWrapper = VImageWrapper(uiImage: originalImage)
processedImage = nil
processedHistogram = nil
originalHistogram = imageWrapper.getHistogram(.original)
Finally, add the following code at the end of both the Equalize Histogram and Reflect buttons’ action closures.
processedHistogram = imageWrapper.getHistogram(.processed)
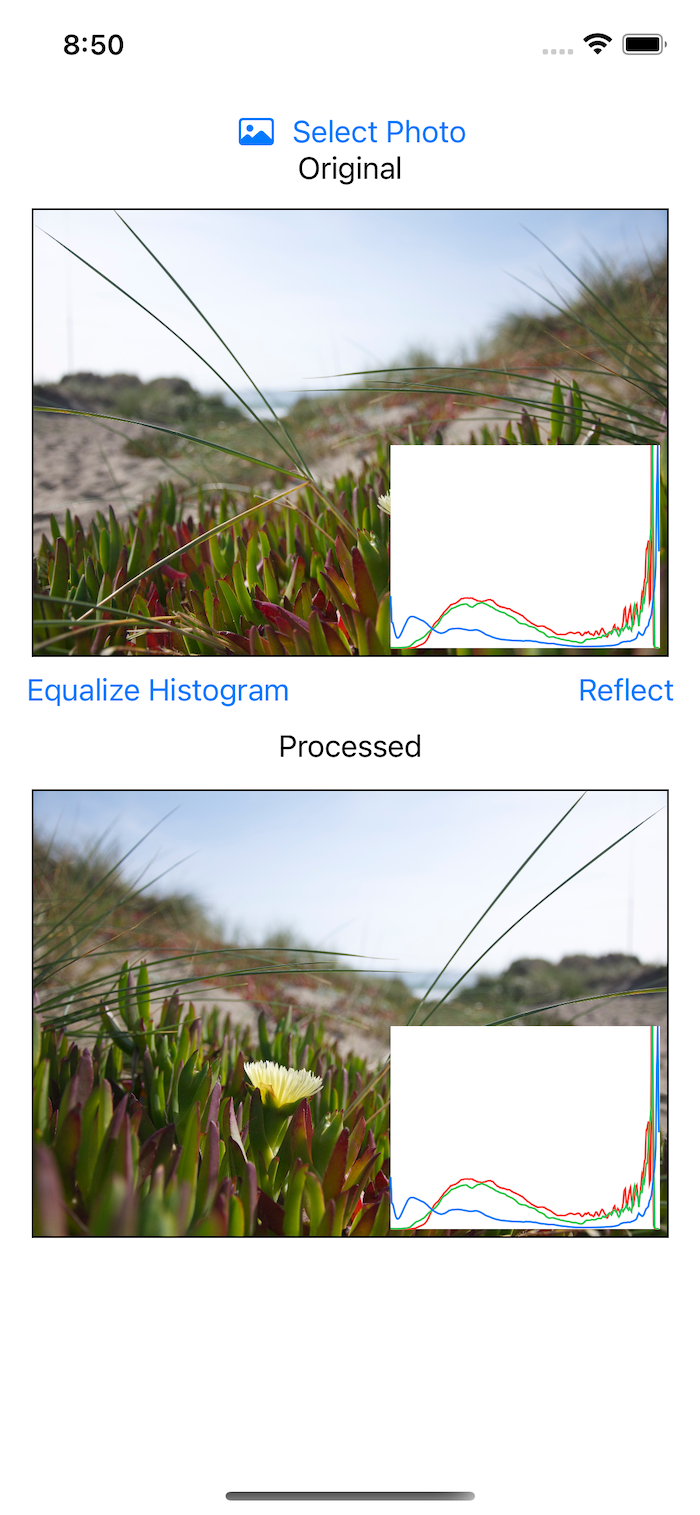
Build and run. Select a photo like before, then tap it and you’ll see that doing so toggles the histogram display on and off. Tap the Equalize Histogram button, and you’ll see the changes made to the histogram for the processed image. It’s quite a dramatic change for most photos.
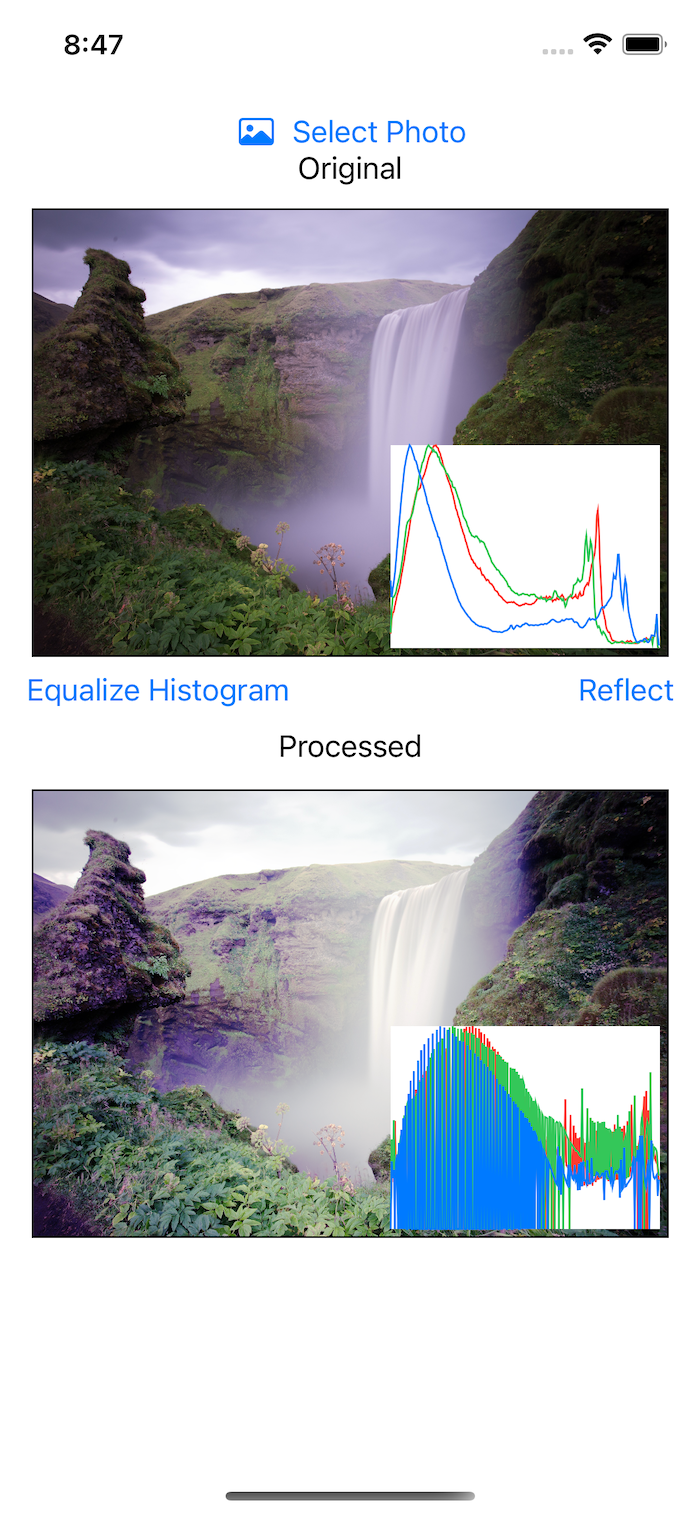
As you might expect, Reflect doesn’t change the histogram because it only changes the orientation of the photo and not the tones of the image.
Where to Go From Here?
To see the final project, click the Download Materials button at the top or bottom of this tutorial.
You’ve learned the Accelerate framework’s basics by exploring image processing using the vImage library. There’s so much functionality in the Accelerate framework that this tutorial barely touches the capabilities and functions it provides. It should give you a strong foundation to understand the challenges you’ll run into working with the partially Swift-friendly framework.
The documentation for Accelerate might be one of the most thorough of any Apple framework. It’s a good starting point to learn what the framework can do. The topics section provides several examples with modern code. It often focuses more on “how” than “why”, but after this tutorial you should better understand the processes behind the framework.
To see how Accelerate adapted for Swift, watch Introducing Accelerate for Swift from WWDC 2019. If you’re interested in signal processing, you’ll find useful information in Using Accelerate and SIMD from WWDC 2018 even though much of the code is a bit outdated since it predates the 2019 Swift updates.
Good luck vectorizing your applications. If you have questions or comments, leave them below.