
Dart Extensions Tutorial: Improve your Flutter Code
Learn how to take your Flutter skills to the next level and make your code reusable with one of Dart’s most useful features: Dart extensions. By Sébastien Bel.
You might already have become familiar with basic Flutter and Dart knowledge. You might even have your first app already published. Yet there is always room for improvement. Dart Extensions can help make your code smoother and simplify some code usage.
This tutorial won’t teach you how to make a full Flutter app; the base is already done. Your job will be to refactor an already working CatFoodCalculator app with extensions. You’ll explore all their usages, including:
- Basic extension creation.
- More advanced usages, including extensions on enums, generics or nullable types.
- Advice on when to use them and when not to.
Getting Started
Download the starter project by clicking the Download Materials button at the top or bottom of the tutorial.
Unzip the downloaded file and open the starter project located in /starter within your favorite IDE. You can run the project on both mobile devices and web browsers.
The CatFoodCalculator app is already working. You’ll only refactor it to include extensions usages.
Look at the files in lib.
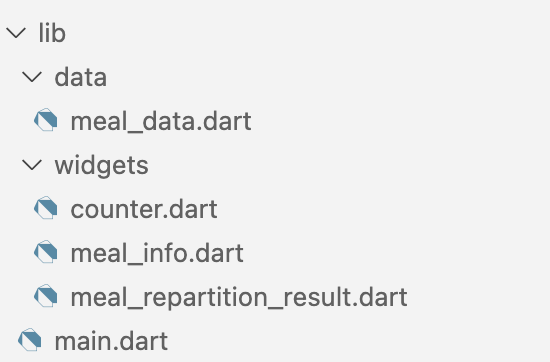
First, open lib/data/meal_data.dart. This is a data class holding your cat’s meal data.
Continue with lib/widgets/counter.dart. This is a UI widget used to increase a counter with buttons instead of having to type the new value.
Then, open lib/widgets/meal_info.dart. This widget is a form to type the recommended amount of food for a cat of a given weight. Note that it also holds the MealType enum.
Next, look at the widgets in lib/widgets/meal_repartition_result.dart. The MealRepartitionResult widget shows the resulting repartition based on MealData.
Finally, open lib/main.dart. This contains the core of your app.
In particular, look for MyHomePage and its state _MyHomePageState. The private method _mainColumnContent() returns the main parts of your UI. The methods _calculateRation() and _updateCatComment() contain the business rules.
Build and run the project. You should see a tool to calculate how much wet and dry food your cats need.

Play with the values using the text fields or the + and – buttons. See how the food repartition changes as a result.
What Is an Extension Method?
In this section, you’ll see what an extension method is and why it’s useful.
Purpose
Creating an extension on a class allows you to add methods to it without changing that class. Extensions are useful for adding features to classes you can’t or don’t want to change.
You might also use them to create shortcuts.
Comparison with Alternatives
When you can’t change a class but want to add a feature related to it, you have three options:
- Use a global or a static method
- Use a wrapper around the desired class and create the method in that wrapper
- Use an extension method
See each of them in the examples below:
// 1. Static method
class StaticMethods {
  static String addCat(String baseString){
    return '$baseString 🐱';
  }
}

// 2. Wrapper
class WrappedString {
  final String baseString;

  WrappedString(this.baseString);

  String addCat() {
    return '$baseString 🐱';
  }
}

// 3. Extension
extension Extension on String {
  String addCat(){
    return '$this 🐱';
  }
}
When starting with the same input String, all three methods add a ' 🐱' at the end of the input. The main difference is how you invoke them.
// 1. Static method
StaticMethods.addCat('bonjour'); // 'bonjour 🐱'

// 2. Wrapper
WrappedString('bonjour').addCat(); // 'bonjour 🐱'

// 3. Extension
'bonjour'.addCat(); // 'bonjour 🐱'
The extension method gives a more fluid API. It feels like it’s a classic method from the base class.
Creating and Using a Basic Extension
Now that you know what Dart extensions are, it’s time to learn more about their syntax. You’ll soon start adding them to the sample project.
Syntax
Look at the example below of a class and its extension.
class ClassToExtend {
  const ClassToExtend({
    required this.aNumber,
    required this.aString,
    });

  final int aNumber;
  final String aString;
}

extension ExtensionName on ClassToExtend {
  String helloWorld() {
    return '$runtimeType says hello to the world';
  }

  String get hello => 'hello $aString';

  int operator +(int other) => aNumber + other;
}
An extension has a name and extends a specific class. In the example above, the name is ExtensionName and the extended class is ClassToExtend.
In the extension body, you can write new methods, getters and even operators! You can refer to public members of the extended class. In the example above, you access aString and aNumber. You can’t access private members of the extended class in the extension code.
final extendedClass = ClassToExtend(aNumber: 12, aString: 'there');

extendedClass.helloWorld(); // ClassToExtend says hello to the world
extendedClass.hello; // hello there
extendedClass + 8; // 20
You create an object of the extended class using a normal constructor. Then, you invoke the methods and the operators defined in the extension as if they were defined in the original class.
Creating StringCaseConverter Extension
For your first extension in the CatFoodCalculator app, you’ll add the firstLetterUppercase() method to String. Name that extension StringCaseConverter.
Start by creating the folder lib/utils. This folder will contain all the extensions you’ll create during this tutorial. Then, create the file string_case_converter.dart in it.
You’re now ready to create the extension StringCaseConverter. It should contain the firstLetterUppercase() method, which, when invoked on a String object, returns its capitalized version. If you’d like, try to do it yourself first. :]
Click the Reveal button to get this extension’s code.
[spoiler title="Solution"]
Here’s the solution:
extension StringCaseConverter on String {
  String firstLetterUppercase() {
    final firstLetter = substring(0, 1);
    final rest = substring(1, length);
    return firstLetter.toUpperCase() + rest;
  }
}
[/spoiler]
With this, you can convert the first letter of a String to uppercase without touching the rest of the String.
Open lib/widgets/meal_info.dart and locate the _title() method. It returns a Text widget that displays “WET food” or “DRY food” based on the MealType. The line below transforms the name of the MealType enum to uppercase.
final foodType = widget.mealType.name.toUpperCase();
You’ll change this line to transform the name of the MealType enum to make only the first letter uppercase.
Start by importing StringCaseConverter:
import '../utils/string_case_converter.dart';
Now, replace the foodType assignment with the following:
final foodType = widget.mealType.name.firstLetterUppercase();
Only the first letter will be uppercase now.
Hot reload and see the updated title:

Note the cat’s weight comment that appears once you set it to a value higher than 7.