Slivers in Flutter: Getting Started
In this article you’ll learn about Slivers in Flutter, how they work, and use them to make a beautifully designed app for recipes. By Michael Malak.
Have you ever wondered how lists and grids work in Flutter? Have you ever wanted to make a complex effect related to scrolling? Do the words complex and impossible echo in your mind once someone mentions slivers?
Well, today is your lucky day! You’re about to start a trip through the enigmatic sliver universe.
In Flutter, a sliver is a slice of a scrollable area you can use to achieve custom scrolling behaviors. When you finish this tutorial, you’ll know more about slivers and be comfortable using them.
Along the way, you’ll learn:
- What slivers are and how they work,
- When to use a sliver.
- How to work with different types of slivers.
Getting Started
Download the starter project by clicking the Download Materials button at the top or bottom of the page.
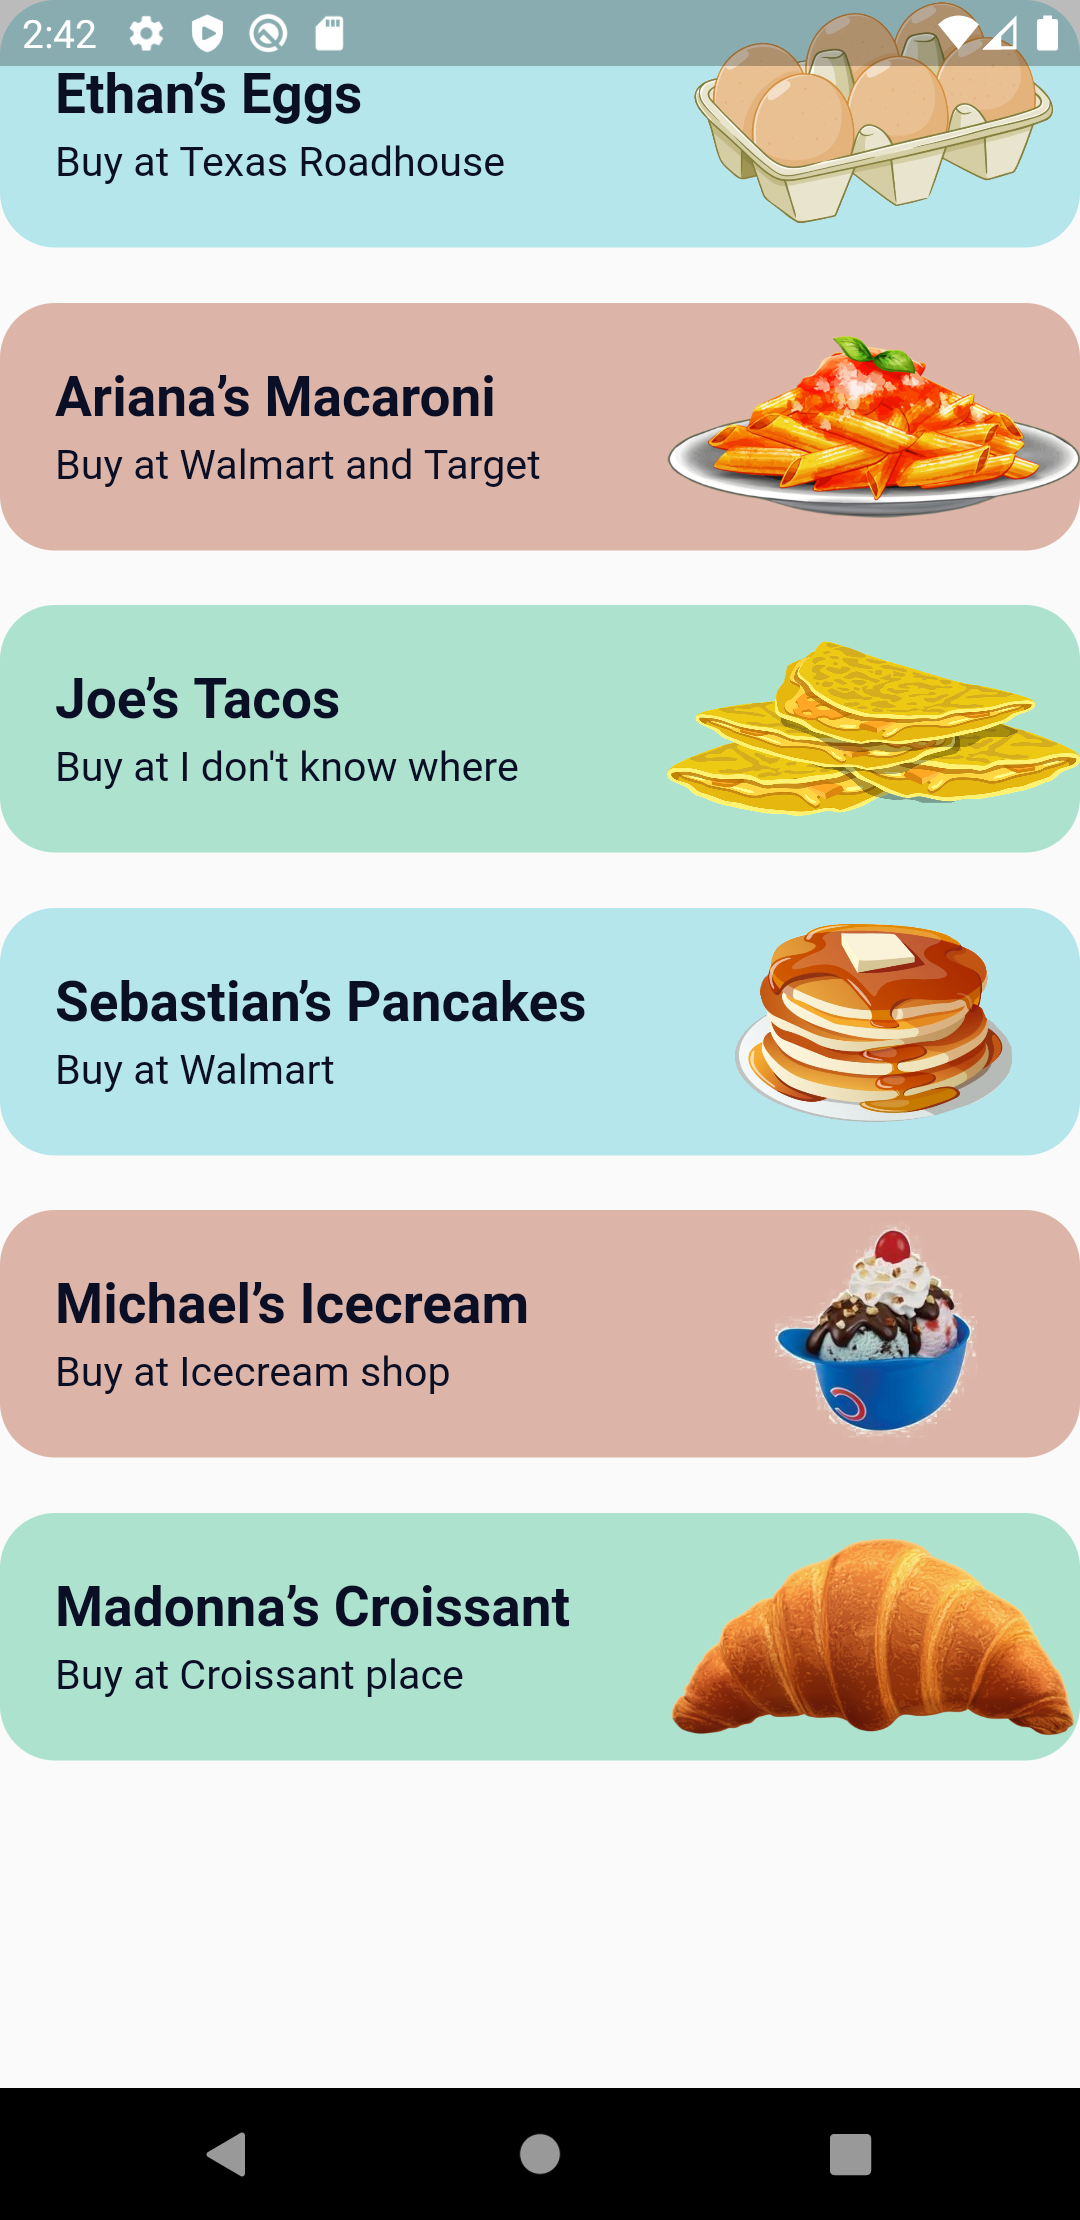
In 2018, a tweet showcasing food recipes written by a pre-k class went viral. In this tutorial, you’ll work on Reciperlich, a fun app that displays these recipes.
The app has two pages. The first page displays a list of recipes. When you click a recipe, you route to the other page to view the recipe details.


This tutorial will use Android Studio 4.1, so some of the screenshots might be specific to it, but feel free to use Visual Studio Code if you’re more comfortable with it.
Choose Open an existing Android Studio Project. Then choose the starter folder from the tutorial materials.
Download the dependencies by opening pubspec.yaml from Android Studio and clicking Pub get at the top.

Finally, build and run. You’ll see a placeholder page.

Now that you’re up and running, time to take a deeper look into Slivers before writing some actual code.
Understanding Slivers
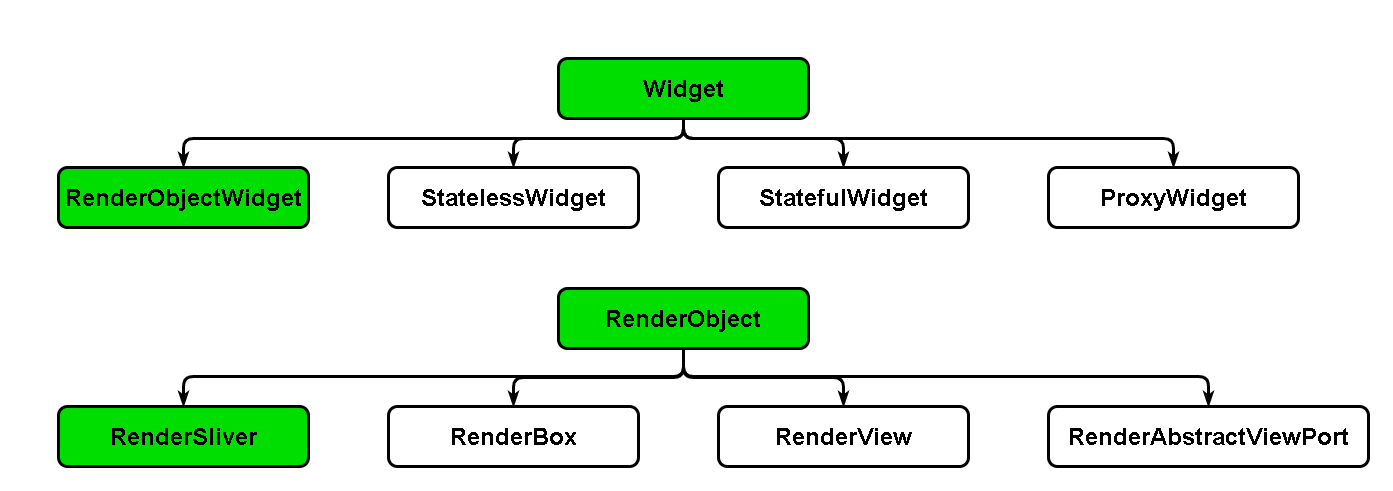
You probably know your way around StatefulWidgets and StatelessWidgets. Did you know they’re not Flutter’s only widgets? Flutter also uses RenderObjectWidgets.
RenderObjecsWidgets act as blueprints that hold the configuration information for RenderObjects. As suggested by their name, these objects are responsible for rendering. They form the basic infrastructure for managing the visual elements tree and defining the layout, painting and composting protocols.
Flutter creates layouts by organizing widgets in trees. When Flutter creates a new widget, the parent widget passes constraint information to its children. RenderObjects work to paint everything.
A RenderBox comprises several RenderObject, like Container or SizedBoxes, and follow box protocol. This protocol lets each widget know its constraints when it’s rendered.
RenderBox only has cartesian corners: width and height. RenderObject paints the layout when a parent object gives its child object the minimum and maximum of both the width and height.
While this works great with boxes, it doesn’t work for scrolling or things like app bar animation and special effects. Consequently, Flutter built a different type of RenderObject for scrolling — RenderSliver. It uses a different protocol, the sliver protocol, to let the RenderObject receive additional constraints from its parent with more axes to ensure the RenderObject only renders when it’s in the viewport.

You might ask yourself – why would I want to use a different kind of RenderObject for scrolling? RenderSliver lets you render child widgets lazily or render only the visible portion of the screen. This makes scrolling large lists efficient.
For example, both ListView and GridView use RenderSliver underneath the hood. Anything that scrolls in Flutter uses slivers except OneBoxScrollView as it doesn’t require lazy loading.
Displaying Recipe List
The starter project has many files. However, the most important are:
-
lib/data/recipe_repository.dart: A class that returns a static constant list of
RecipeModels. -
lib/pages/recipe_list/widgets/recipe_item_widget.dart: A widget that accepts a
RecipeModeland displays a recipe list tile.
The starter code has an empty recipe list page, which opens once you open the app. You’ll display the recipes list in a SliverList.
Replace the content of lib/pages/recipe_list/recipe_list_page.dart with:
import 'package:flutter/material.dart';
import 'package:reciperlich/data/recipe_repository.dart';

import 'widgets/recipe_item_widget.dart';

class RecipeListPage extends StatelessWidget {
  const RecipeListPage({Key key}) : super(key: key);

  @override
  Widget build(BuildContext context) {
    // 1
    final recipes = RecipeRepository.getRecipes();

    return Scaffold(
      // 2
      body: CustomScrollView(
      // 3
      slivers: <Widget>[
           // TODO: Add a cool AppBar

           // 4
           SliverFixedExtentList(
              // 5
              itemExtent: 110,
              // 6
              delegate: SliverChildBuilderDelegate(
                    (context, index) => Padding(
                    padding: const EdgeInsets.only(bottom: 20),
                    // 7
                    child: RecipeItem(recipes[index])),
                childCount: recipes.length,
              ),
            ),
        ],
      ),
    );
  }
}
This code is a bit long, but no worries, let’s break it down.
In the code above, you:
- Fetch the recipe list from the repository.
- Define the main widget where you’ll put all your slivers.
- Use a
CustomScrollViewthat has asliversargument, instead of the commonly usedchildren, to remind you that all its children must produceRenderSlivers. -
SliverFixedExtentListreturns a sliver that displays a linear list of children, all with the same extent, width or height, depending on the main axis. - Determine the item extent of a single recipe item. In this case, the extent is the height.
- Determine the delegate type as
SliverChildBuilderDelegateand give this delegate thechildCountwhich is the recipes’ count. The delegate returns anindexvalue. - The child itself is a
RecipeItemwhich receives aRecipeModelfrom the list of recipes.
ListView. It’s a wrapper that wraps around SliverList or SliverFixedExtentList if it has itemExtent. However, you’ll want to eventually add more slivers to the CustomScrollView.You could’ve used SliverChildListDelegate instead of SliverChildBuilderDelegate. SliverChildListDelegate is a delegate that supplies the list of RecipeItem widgets explicitly without a builder that provides an index. It looks like this:
delegate: SliverChildListDelegate(
  recipes
      .map((e) => Padding(
      padding: const EdgeInsets.only(bottom: 20),
      child: RecipeItem(e)))
      .toList(),
),
However, SliverChildListDelegate requires building all the widgets in advance which isn’t efficient and reduces the benefit of building children lazily. So SliverChildBuilderDelegate is the better choice.
Build and run. Tada! Now you have a list of recipes.
You’ve just used SliverFixedExtentList but you didn’t really stop to understand why, and why not use the before-mentioned SliverList instead. Time to dive deeper into these topics.