Document-Based Apps Using SwiftUI
SwiftUI makes it easier than ever to create document-based apps that work with the iOS document interaction system. In this tutorial, you’ll learn how to create a SwiftUI document-based meme-maker app. By David Piper.
Creating a Meme Editor
All the files you created before are independent of the platform. But MemeEditor will use different platform-specific methods to import images based on whether the app runs on iOS/iPadOS or macOS.
In a later step, you’ll create another MemeEditor to show on macOS, but for now, start with the iOS and iPadOS version. Create a new SwiftUI view file, MemeEditor_iOS.swift. This time it shouldn’t be in the Shared group but in iOS. Remember to check only the MemeMaker (iOS) target.
Replace the view in the file with the following code:
struct MemeEditor: View {
  @Binding var meme: Meme
  @State var showingImagePicker = false
  @State private var inputImage: NSUIImage?
}
MemeEditor has a binding to the meme it presents together with two properties. You’ll use showingImagePicker to decide when to present the image picker that lets your user select an image. You will then store the image in inputImage.
Next, add a new method to the struct to store the input image:
func loadImage() {
  guard let inputImage = inputImage else { return }
  meme.imageData = inputImage.data
}
Now you can add the body inside the view:
var body: some View {
  // 1
  TextLayer(meme: $meme) {
    // 2
    Button {
      showingImagePicker = true
    } label: {
      if meme.imageData != nil {
        ImageLayer(imageData: $meme.imageData)
      } else {
        Text("Add Image")
          .foregroundColor(.white)
          .padding()
          .background(Color("rw-green"))
          .cornerRadius(30)
          .padding(.vertical, 50)
      }
    }
  }
  // 3
  .sheet(isPresented: $showingImagePicker, onDismiss: loadImage) {
    UIImagePicker(image: $inputImage)
  }
}
Here’s what’s going on in the body:
- First, create a new
TextLayerand pass both a binding tomemeand a closure to create theImageLayer. - In this closure, define a button that sets
showingImagePickertotruewhen tapped. Use theImageLayerdefined above as its label or show a button if the meme doesn’t yet contain an image. - Use
sheetto show aUIImagePickerwhenevershowingImagePickeris set totrue.UIImagePickeris a wrapper aroundUIImagePickerControllerto make it usable with SwiftUI. It allows users to select an image from their device, and it callsloadImagewhenever the picker is dismissed.
Next, replace the preview in the file with the following:
struct MemeEditor_Previews: PreviewProvider {
  @State static var meme = Meme(
    imageData: nil,
    topText: "Top Text Test",
    bottomText: "Bottom Text Test"
  )

  static var previews: some View {
    MemeEditor(meme: $meme)
  }
}
Your preview should now show a test of your view:

Finally, open ContentView.swift. Replace the contents of body with the following code, which is a dedicated meme editor as opposed to a text editor:
MemeEditor(meme: $document.meme)
Here you replaced TextEditor with the new MemeEditor. You pass the document’s meme to MemeEditor, letting user manipulate and work on a meme.
Finally, after all this coding, MemeMaker is ready to run on an iPhone! Select the MemeMaker (iOS) scheme and build and run. Create a new document, which looks like this:

Now you can choose a funny image, add some text and improve your meme-making skills. Try to create a funny meme like this one:

Good work! :]
Using the App on macOS
A big advantage of SwiftUI is that you can use it on all Apple platforms. But although you used NSUIImage, there are still some changes you need to make before you can run MemeMaker on macOS.
Implementing a MemeEditor for macOS
Because MemeEditor uses UIImagePickerController, you can’t use it on macOS. Instead, you’ll create another version of MemeEditor that’s used when running the app on macOS. It’ll use NSOpenPanel to let the user select an image as the background of the meme.
But thanks to SwiftUI, most of the views can stay the same. You can reuse both ImageLayer and TextLayer. The only difference is how the user selects an image.
Create a new SwiftUI View file in the macOS group and call it MemeEditor_macOS.swift. Only check the MemeMaker (macOS) target. Replace the contents of this file with the following code:
import SwiftUI

struct MemeEditor: View {
  @Binding var meme: Meme

  var body: some View {
    VStack {
      if meme.imageData != nil {
        TextLayer(meme: $meme) {
          ImageLayer(imageData: $meme.imageData)
        }
      }

      Button(action: selectImage) {
        Text("Add Image")
      }
      .padding()
    }
    .frame(minWidth: 500, minHeight: 500)
  }

  func selectImage() {
    NSOpenPanel.openImage { result in
      guard case let .success(image) = result else { return }
      meme.imageData = image.data
    }
  }
}
Here, you create a similar view to the one you created earlier for iOS. This time, though, you add a separate button to call selectImage. selectImage uses NSOpenPanel to let your user pick an image. If the selection succeeds, you store the new image data in the meme.
Finally, add a preview to the bottom of the file:
struct MemeEditor_Previews: PreviewProvider {
  @State static var meme = Meme(
    imageData: nil,
    topText: "Top Text",
    bottomText: "Bottom Text"
  )

  static var previews: some View {
    MemeEditor(meme: $meme)
  }
}
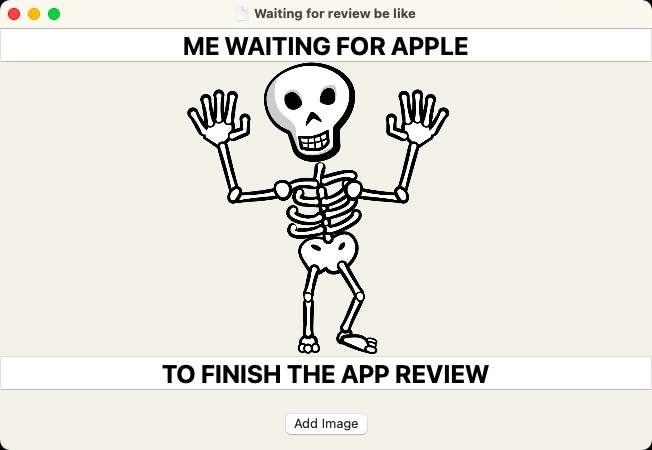
Build and run. (You’ll need macOS 11.0 or higher.) This is what the app looks like:

You can create the same meme on macOS:
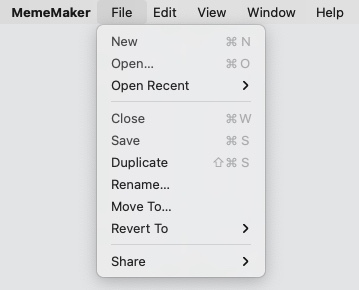
Without any extra work, the Mac app already has a working menu with shortcuts. For example, you can use Command-N to create a new document and Command-S to save the document, or you can undo your last change with Command-Z.
Isn’t it amazing how easy it is to create an app that uses documents and runs on both iOS and macOS? :]
Where to Go From Here?
You can download the completed project files by clicking the Download Materials button at the top or bottom of this tutorial.
Documents are a central part of many good apps. And now with SwiftUI, it’s even easier to build document-based apps for iOS, iPadOS and macOS.
If you want to dive deeper into SwiftUI document-based apps, see Apple’s Build document-based apps in SwiftUI video.
For more information about SwiftUI, check out the SwiftUI: Getting Started tutorial or the SwiftUI by Tutorials book.
To create a document-based UIKit app, you’ll find more information in the Document-Based Apps Tutorial: Getting Started article.
We hope you enjoyed this tutorial. If you have any questions or comments, please join the forum discussion below!